Cedral Cladding
Cedral Wall Cladding are high quality fibre-cement weatherboards (siding) that has the visual appeal of natural timber. As the the first line of defence of the external walls of a building, it protects the building from effects of sun, rain and snow and also from heat and cold. Cedral Cladding can enhance the look of the building. They are available as the traditional overlap -- Cedral Lap and as flush cladding -- Cedral Click, depending on the finish you desire. Both systems come with full array of accessories for quick and easy installation.
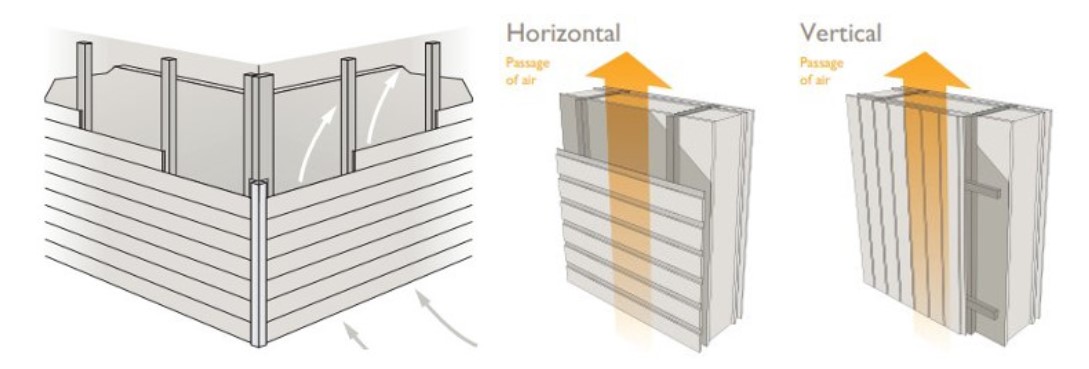
The smaller dimensions of the planks would allow for expansion and contraction due to moisture and temperature changes. Both systems Cedral Lap and Cedral click use the ventilated rainscreen principle - air is allowed to flow in at the base of the system, behind the cladding and then out, over the top cladding. This air flow action enables the system to remove moisture and to keep the walls dry, thus creating a more comfortable living environment.
Rainscreen Principle
Types of Cedral Cladding
- Cedral Lap -- the overlap method
- Cedral Click -- the flush tongue and groove method
Advantages of using Cedral Cladding
- Lightweight,
- Quick and easy to install,
- Cost effective,
- Has attractive aesthetic qualities,
- Has timber like surface finish,
- Protects from effects of sun, rain and snow,
- Has good acoustic properties,
- Easy to maintain and repair,
- A sustainable material.
Cedral Lap -- the overlap method

Installation of Cedral Lap
- Ensure that a damp proof membrane fitted between the battens and the building structure.
- Vertical timber battens should be mounted at 600mm centres.
- Ensure a gap of at least 30 mm behind the boards to allow air circulation. This prevents moisture build-up.
- Install the starter trim on level.
- Install the first board on the starter trim.
- The planks should be screwed or nailed flush at every batten.
- Stainless fixings are advisable for best durability.
- A cover strip or drip trim should be fixed at the top to prevent moisture from entering the cavity.
- Use relevant trims at corners, window and door reveals and open ends.
Cedral Click -- the flush tongue and groove method
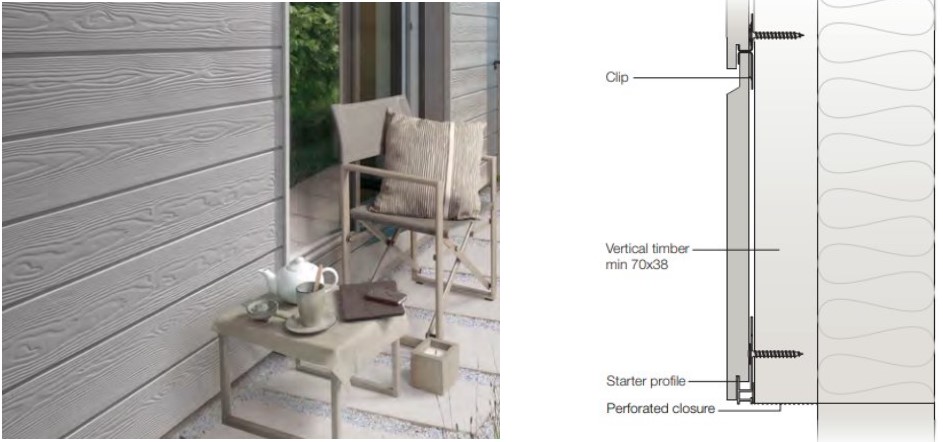
Installation
- The planks are fixed on top of each other, the tongue pushed into the groove.
- Ensure a damp proof membrane fitted between the battens and the building structure.
- Vertical timber battens should be mounted at 600mm centres.
- Ensure a gap of at least 30 mm behind the boards to allow air circulation. This prevents moisture build-up.
- Install the starter trim on level.
- Install the first board on the starter trim.
- The planks should be screwed or nailed flush at every batten.
- Stainless fixings are advisable for best durability.
- A cover strip or drip trim should be fixed at the top to prevent moisture from entering the cavity.
- Use relevant trims at corners, window and door reveals and open ends.
CHOOSE MANUFACTURERS
Brand: Etex Exteriors
Model and Size: 186mm x 3600mm - 0.67m2
Delivery Time: 5 - 7 days
12mm Cedral Click is a flush fitting, tongue and groove fibre cement cladding board with the visual appeal of natural timber, an ideal low maintenance, rot free alternative to traditional timber cladding. Once installed, the external surface would be flush fit and give a natural timber look. Cedral ..
Guide Price: £28.19
£33.83 inc VAT
Brand: Etex Exteriors
Model and Size: 190mm x 3600mm - 0.68m2
Delivery Time: 5 - 7 days
10mm Cedral Lap is an attractive, fibre cement cladding board with the visual appeal of natural timber an alternative to all types of traditional cladding. Cedral Lap is fitted in traditional lapped style and is rot free. Cedral Lap boards are installed to the ventilated rainscreen principle - air c..
Guide Price: £20.89
£25.07 inc VAT
Brand: Etex Exteriors
Model and Size: 190mm x 3600mm - 0.68m2
Delivery Time: 5 - 7 days
10mm Cedral Lap with Woodstain Finishe is an attractive, fibre cement cladding board, an alternative to all types of traditional cladding. Cedral Lap is fitted in traditional lapped style and is rot free. Cedral Lap boards are installed to the ventilated rainscreen principle - air can flow..
Guide Price: £24.04
£28.85 inc VAT
Brand: Etex Exteriors
Model and Size: 50nos - Free delivery
Delivery Time: In stock, 1-2 days
Stainless Steel Clips and Screws for Cedral Click is an accessory for fixing Cedral Click flush fitting, fibre cement, tongue and groove planks. Supplied with screws in a box of 50 nos...
£35.93
£43.12 inc VAT
Brand: Etex Exteriors
Model and Size: 3m
Delivery Time: In stock, 1-2 days
Cedral Click Aluminium Starter Profile for Cedral Click Boards installed HORIZONTALLY is an accessory for fixing Cedral Click weatherboard cladding to the structure to begin the cladding procedure. Cedral Click boards are Installed horizontally. This starter profile is used at base of the external w..
Guide Price: £34.81
£41.77 inc VAT
Brand: Etex Exteriors
Model and Size: 3m
Delivery Time: In stock, 1-2 days
Cedral Click Aluminium Starter Profile is an accessory for fixing Cedral Click weatherboard cladding to the structure to begin the cladding procedure vertically. Cedral Click boards are Installed vertically. This starter profile is used at base of the external wall installed absolutely level to ensu..
Guide Price: £21.19
£25.43 inc VAT
Brand: Etex Exteriors
Model and Size: 3m
Delivery Time: In stock, 1-2 days
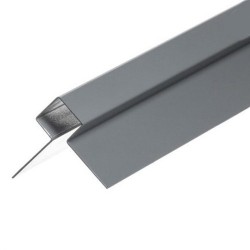
External Aluminium Corner Profile for Cedral Click is an aluminium trim that can be used to provide protection on external corners and or where detailing on a window reveal for Cedral Click weatherboard systems. It is used on vertical corners where lapped boards are being installed on either side of..
£25.79
£30.95 inc VAT
Brand: Etex Exteriors
Model and Size: 3m
Delivery Time: In stock, 1-2 days
Internal Aluminium Corner Profile for Cedral Click is an universal aluminium trim that can be used to finish the corner where Cedral Click plank meets an internal corner forming a seal between the trim and the corner. It is used on vertical corners where lapped boards are being installed on eit..
Guide Price: £22.15
£26.58 inc VAT
Brand: Etex Exteriors
Model and Size: 3m
Delivery Time: In stock, 1-2 days
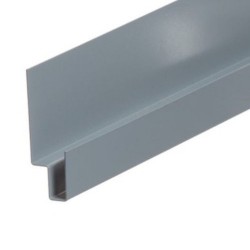
Aluminium Window Lintel Profile for Cedral Click is an universal aluminium trim that is used horizontally above window and door heads to protect the edge of the board and to hide the tongue and grove detail, and also to support the next course of Cedral Click plank. Available at 3m lengths. Ava..
Guide Price: £25.36
£30.43 inc VAT
Brand: Etex Exteriors
Model and Size: 3m
Delivery Time: In stock, 1-2 days
Aluminium Starter Profile for Cedral Lap is an accessory for fixing Cedral Lap weatherboard cladding to the base structure, to start the process. Starter profile would cover the first batten with a lip and start the cladding run. Available at 3m lengths. Colour match to Cedral Lap plank is avai..
Guide Price: £20.89
£25.07 inc VAT
Brand: Etex Exteriors
Model and Size: 3m
Delivery Time: In stock, 1-2 days
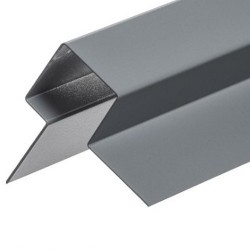
Symmetric Aluminium Corner Profile for Cedral Lap is an universal aluminium trim that can be used to provide protection on external corners and as a stop profile in Cedral Lap weatherboard cladding system. It is used on vertical corners where lapped boards are being installed on either side of that ..
Guide Price: £36.31
£43.57 inc VAT
Brand: Etex Exteriors
Model and Size: 3m
Delivery Time: In stock, 1-2 days
Asymmetric Aluminium Corner Profile for Cedral Lap is an universal aluminium trim that can be used to provide protection on external corners and as a stop profile in Cedral Lap weatherboard cladding system. It is used on vertical corners where lapped boards are being installed on either side of..
Guide Price: £30.21
£36.25 inc VAT
Brand: Etex Exteriors
Model and Size: 3m
Delivery Time: In stock, 1-2 days
Internal Aluminium Corner Profile for Cedral Lap is an universal aluminium trim that can be used to provide protection on internal corners in Cedral Lap weatherboard cladding system. It is used on vertical corners where lapped boards are being installed on either side of that corner. It can be ..
Guide Price: £26.61
£31.93 inc VAT
Brand: Etex Exteriors
Model and Size: 3m
Delivery Time: In stock, 1-2 days
Aluminium End Profile - end 45mm for Cedral Lap is an universal aluminium trim that can be used vertically at the end of a cladding run to butt the boards against, protecting the weatherboard and giving a straight edge framing to clad area. Available at 3m lengths. Colour match to Cedral Lap plank a..
Guide Price: £25.63
£30.76 inc VAT
Brand: Etex Exteriors
Model and Size: 3m
Delivery Time: In stock, 1-2 days
Aluminium End Profile for Cedral Lap - end 65mm is an universal aluminium trim that can be used vertically at the end of a cladding run to butt the boards against, protecting the weatherboard and giving a straight edge framing to clad area. The End profile 65 will also cover the 38mm batten if ..
Guide Price: £29.10
£34.92 inc VAT
Brand: Etex Exteriors
Model and Size: 40mm - 2.5m
Delivery Time: In stock, 1-2 days
40m Aluminium Perforated Closure Profile for Cedral is an accessory for fixing Cedral weatherboard cladding installation to block insects entering. Can be used with both Cedral Click and Cedral Lap cladding systems. Available at 2.5m lengths. ..
£16.61
£19.93 inc VAT
Brand: Etex Exteriors
Model and Size: 3m
Delivery Time: In stock, 1-2 days
Aluminium Connection Profile is an universal aluminium trim used to wrap around the edge of the weatherboard on a window or door reveal or along the soffit line. It can also be used as an external corner. Available at 3m lengths. Colour match to Cedral plank available. Note: This product ..
Guide Price: £29.85
£35.82 inc VAT
Brand: Etex Exteriors
Model and Size: 38mm x 4.8mm
Delivery Time: In stock, 1-2 days
Colour matched Stainless Steel Screws for Cedral (colour to match Cedral Cladding) used for fixing Cedral Click and Cedral Lap fibre cement weatherboard planks to the structure and to battens. Box of 100. Cedral Lap &nbs..
£48.23
£57.88 inc VAT
Brand: Etex Exteriors
Model and Size: 500ml
Delivery Time: In stock, 1-2 days
500ml Weatherboard Touch Up Paint to repair Cedral weatherboards, where there is damage to paint or on cut edges. Available in colours to match Cedral weatherboards. Maintains an aesthetically-pleasing finish where weatherboards are damaged, or cut...
£26.41
£31.69 inc VAT
Showing 1 to 19 of 19 (1 Pages)


